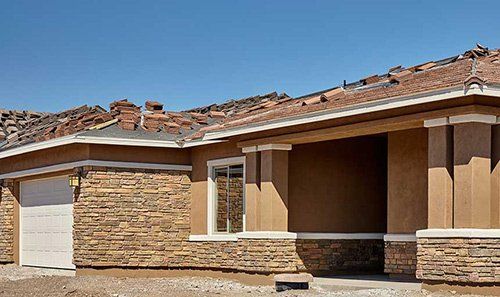
6 Steps To Installing Thin Stone Veneer
- By office@indiancreekstone.com (Admin)
- •
- 04 Jun, 2018

6 Steps To Installing Thin Stone Veneer
It's not difficult for a homeowner to install thin veneer on their home independently. However, an understanding of the installation process ensures that a quality job is performed and that stone won't start to prematurely deteriorate.
There are six general steps to a successful thin stone veneer installation project. The following are important steps to help you install your own thin veneer on the exterior of your home.
1. Prepare The Surface
Before thin veneer can be installed over the surface of a wall, the surface needs to be prepared. The preparation procedures that are necessary depend on the type of surface the veneer is installed over. In all cases, it may be necessary to remove any chemical film on the wall as part of preparation.
If the surface of the exterior wall is constructed from concrete, then thin stone veneer can be applied directly to the surface. However, it is necessary to check the concrete before installation for any defects or any seal or paint coatings that may interfere with the installation.
For framed exterior walls, it's often necessary to apply a paper-backed lath to the wall surface to prep the wall for thin veneer installation.
2. Install From The Corners
It's important to be aware of the advantages of beginning thin veneer installation at the corners. Starting installation at the corners makes it easier to pattern around the corners and sides of the walls.
Corner pieces should be alternated with a long end and a short end. They should alternate in opposite directions for the best visual effect and continuity of the pattern.
3. Mix And Set The Mortar
When it comes to installing thin stone veneer, either type N or type S mortar is generally used. When you purchase stone veneer, check with the supplier to see which type of mortar is appropriate. Generally speaking, the mortar type will vary based on the exact variety of stone being used.
Another thing you should check on is whether you need to put any admixture in the mortar to ensure adequate bonding strength. Once the mortar is mixed, it should be put down with a thickness about half an inch between the surface of the wall and the stone face.
4. Create Grout Joints
Grout joints are spaces where mortar shows through between stone pieces in the thin veneer. These joints should naturally form when the mortar is forced between and around stone pieces when they are set in the mortar.
Additional mortar can be put in between stone pieces using a tuck pointing tool or a grout bag if enough grout space doesn’t naturally form in between stone pieces.
5. Construct Control And Movement Joints
For the best results, you need to factor the location of structural joints in the preexisting building into your placement of control and movement joints in thin veneer pieces.
Over time, materials on your walls' exteriors are going to adjust slightly — due to changes in temperature and in environmental pressures.
It's important to carefully inspect the existing structure and look for any material features that indicate locations where movement is likely to occur. Then, you need to understand how to place control and movement joints in your stone veneer to correspond with these locations.
6. Perform Necessary Maintenance
Thin stone veneer needs to be properly maintained over time to prevent it from prematurely aging or becoming easily damaged. Two of the most important maintenance practices include cleaning veneer and sealing it to repel water and protect its coloring.
You can find the perfect thin stone veneer for your property or building project by getting in touch with Indian Creek Stone Products and exploring our inventory.

