
Prepping Stone Veneer For Installation
- By office@indiancreekstone.com (Admin)
- •
- 04 Jun, 2018
Prepping Stone Veneer For Installation
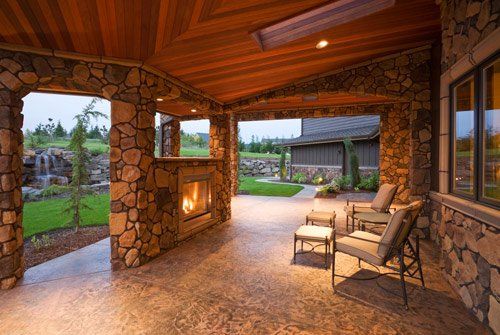
Many homeowners take pride in the appearance of their property. Curb appeal plays a significant role in the overall aesthetic of a property, and it can even affect the financial value of a home. Adding natural stone can be a simple and effective way to improve and update a home's outward appearance.
If you like the look of natural stone, but you don't want to incur the expense of adding actual stone to your home's exterior, then utilizing stone veneer products can be beneficial. Stone veneer can be applied directly over the top of almost any masonry surface, and it can even be installed over wood and stucco. This allows you place the veneers over the top of your home's existing exterior materials with ease.
Proper preparation of the stone veneer is critical when it comes to the performance and beauty of these products. Here are three tips that you can keep in mind to properly prepare your stone veneer for installation in the future.
1. Wash The Stone
Stone veneer is manufacturing by trimming actual pieces of stone to make them thinner and more manageable. This trimming process helps to reduce bulk and weight, but it can leave the stone veneer looking a bit dingy.
Before you begin the installation process, you should take the time to carefully wash the stone veneer that you will be placing on your home's exterior. Running the stone veneer underneath a garden hose will remove any excess dirt and debris created during manufacturing and allow you to see the true color of the stones so that you can place them in an aesthetically pleasing pattern as you install the stone veneer onto your home's exterior.
2. Shape The Stone
Once you have cleaned the surface of your stone veneer to eliminate dirt and debris created during manufacturing, you should measure the area onto which the stone veneer will be installed.
Create an area on the ground that matches these measurements, then lay the stone veneer out in this area to ensure you have a pattern that is pleasing to the eye. Laying out your stone veneer prior to installation will also give you the opportunity to see where you need to trim or shape the stone to achieve your desired aesthetic and dimensions.
Stone veneer can be shaped using a circular saw equipped with a sturdy masonry blade, a pair of wide-mouth nippers, or a maul and chisel depending on the material the veneer is made from. Shaping the stone prior to application helps to reduce installation time and ensures the installation process goes as smoothly as possible.
3. Keep Stones Wet
Once you have cleaned and shaped the stone veneer that you will be installing on your home's exterior, it's important that you take the time to keep the stones wet throughout the installation process.
Many veneers are made of porous materials that absorb moisture. You don't want the stone veneer to draw the moisture out of the grout during installation, as this could negatively affect the way the grout cures and prevent your stone veneer from being structurally stable over time.
By keeping the stone veneers wet throughout the installation process, you ensure that each stone is saturated prior to coming into contact with the grout. A saturated stone cannot absorb any more water, so the moisture levels in the grout will remain constant and allow the stone veneer on your home to remain durable in the future.
Adding stone veneer to your home's exterior can be a great way to update the look of your property. Preparing the stone veneer properly is critical to the success of the installation process. Take the time to visit with the professionals at Indian Creek Stone Products for more information on how you can successfully install your own stone veneer.
